10 Tips for Choosing the Right Insulation Membrane

Choosing the right Insulation Membrane is not a cosmetic decision. It affects moisture control, indoor comfort, energy use, and the service life of the building envelope. A membrane may look strong on a product sample, yet perform poorly when exposed to wind, condensation, poor detailing, or repeated temperature changes.

Building scientist Dr. Joseph Lstiburek has repeatedly emphasized, “A vapor barrier is not an air barrier.” This distinction matters. A vapor-control layer manages vapor movement, while an air barrier limits uncontrolled air leakage. Some products can perform both roles, but only when their specifications and installation methods support that use. Checking permeability, tensile strength, water resistance, fire performance, and temperature tolerance is essential.

This guide presents ten practical tips for evaluating an Insulation Membrane. It considers climate, wall or roof location, insulation type, joint treatment, and compatibility with adjacent materials. A cold roof may require a different solution from a humid basement wall. Small gaps around fasteners can also undermine an otherwise excellent system.

Real projects are rarely perfect.

Installers may face uneven substrates, rushed schedules, or unclear drawings. I have seen how one overlooked lap can become a pathway for moisture. That is why product data should be compared with site conditions, not accepted at face value. Independent testing, manufacturer guidance, and advice from a qualified building-envelope professional can reduce uncertainty. The best choice is not always the thickest or most expensive membrane. It is the one that works reliably within the complete assembly.
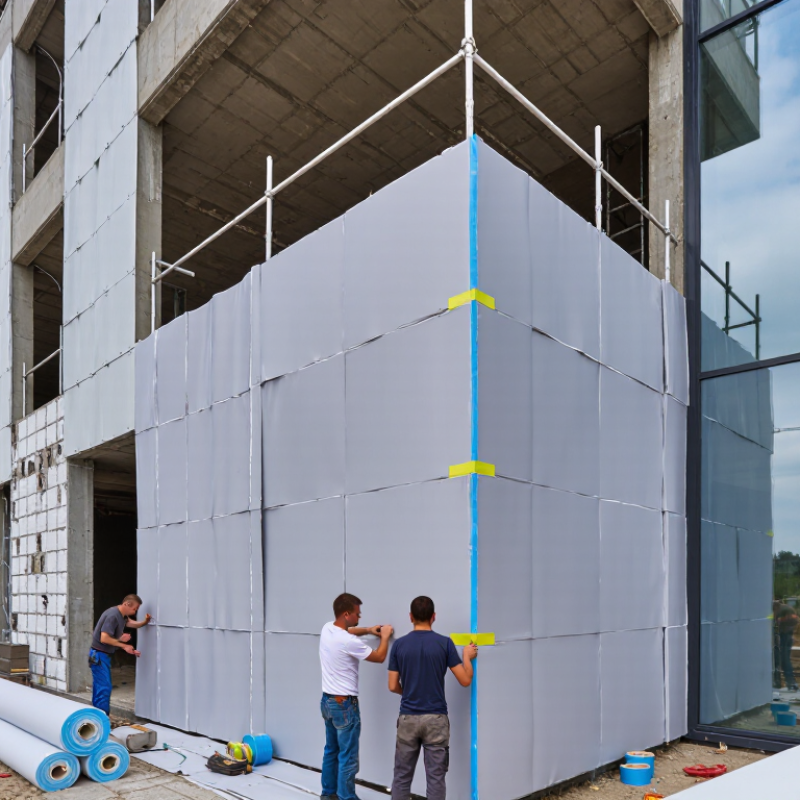
10 Tips for Choosing the Right Insulation Membrane

Understanding the Purpose and Types of Insulation Membranes

10 Tips for Choosing the Right Insulation Membrane

Understanding the Purpose and Types of Insulation Membranes

An insulation membrane is not insulation itself. It manages air, vapor, water, or radiant heat around the insulation layer. That distinction matters. The IEA’s Energy Efficiency 2023 report places buildings near 30% of global final energy use. UNEP’s 2023 Global Status Report reports that buildings consumed 34% of global energy and generated 37% of energy- and process-related emissions in 2022. A correctly selected membrane can reduce heat loss, moisture damage, and uncomfortable drafts.

Start with the building’s climate and wall assembly. Vapor-control membranes limit diffusion, while air-barrier membranes stop uncontrolled air movement. Water-resistive membranes help protect sheathing from wind-driven rain. Reflective membranes need an adjacent air space to work effectively. Check permeability, vapor resistance, tensile strength, UV exposure limits, and temperature range. Do not guess. A membrane that performs well in a cold roof may trap moisture in a warm, humid wall.

On site, inspect laps, corners, penetrations, and service openings. Small gaps can undermine a careful design. I have seen a smooth membrane installation fail because an unsealed cable opening became a moisture path. Follow the manufacturer’s tested installation method, but verify compatibility with insulation, sealants, fasteners, and cladding. Review condensation risk using local weather data and the complete assembly, not one product value. Some specifications still look impressive while ignoring workmanship. That is where practical judgment remains necessary.

Assessing Climate, Building Design, and Moisture Conditions

10 Tips for Choosing the Right Insulation Membrane

Assessing climate should guide every membrane decision. In cold regions, vapor control helps prevent indoor moisture from reaching cold surfaces. In hot, humid areas, the wall may need to dry inward. A membrane that performs well in one climate can trap moisture elsewhere. Check seasonal humidity, wind-driven rain, snow, and temperature changes. Local building codes provide a useful baseline, but they cannot replace project-specific judgment. I have seen small climate differences change the safest membrane location.

Building design matters just as much. Review wall orientation, roof shape, insulation depth, and ventilation paths. South-facing walls may experience stronger solar drying. Complex corners and service penetrations need continuous air control. During renovations, existing masonry or damaged sheathing can limit drying. Measure before selecting. Guessing is risky. A simple drawing can reveal missing overlaps, weak joints, and difficult transitions.

Moisture conditions deserve close attention. Inspect staining, musty odors, condensation, and groundwater exposure before installation. Select a membrane with suitable vapor permeability, water resistance, and air-sealing performance. Consider how the assembly will dry after a leak. A hygrothermal assessment can test that risk, especially for thick walls or mixed climates. I once focused too heavily on thermal resistance and underestimated drying potential. That mistake changed my approach. Reliable installation also requires compatible tapes, sealed edges, and careful protection during construction. Even the best membrane fails when punctures remain unnoticed.

Comparing Thermal Performance, Breathability, and Water Resistance

Choosing an insulation membrane requires more than reading its advertised R-value. The IEA’s 2023 Global Status Report for Buildings and Construction found that buildings consumed about 30% of global final energy in 2022. Small envelope failures can therefore become expensive.

Tip 1: Compare thermal resistance under realistic conditions. A membrane’s stated value may change with thickness, moisture, temperature, and installation quality. The U.S. Department of Energy notes that air sealing can reduce heating and cooling costs by up to 20%. In practice, a poorly sealed lap can undermine excellent insulation. I have seen this during site inspections. Laboratory figures do not always survive careless detailing.

Tip 2: Check breathability, not just vapor resistance. ASTM E96 or equivalent testing can show vapor permeance, but climate and wall direction still matter. ASHRAE’s Handbook—Fundamentals recommends evaluating moisture movement through the complete assembly. A highly vapor-tight layer may help in cold conditions, yet trap moisture in warmer climates. This judgment is not always comfortable.

Tip 3: Test water resistance and drainage performance. Review hydrostatic pressure results, joint detailing, and expected exposure. A membrane should shed wind-driven rain while allowing planned drying. The Building America Solution Center emphasizes continuous control layers around penetrations and transitions. Look for tested seams, not attractive samples. Water finds weak corners.

Checking Material Quality, Durability, Safety, and Compatibility

10 Tips for Choosing the Right Insulation Membrane

Checking Material Quality, Durability, Safety, and Compatibility

A reliable insulation membrane begins with verified material quality. Check its thickness, density, tensile strength, and water resistance. Do not trust appearance alone. A smooth sheet may still tear around fasteners. Request current test reports and technical data from the supplier. Look for clear testing methods, not vague performance claims. During site inspections, I have found that storage conditions affected membranes before installation. Heat, moisture, and sharp concrete edges can quietly reduce performance.

Durability depends on the building environment. Compare the membrane with expected temperatures, ultraviolet exposure, humidity, and movement. A roof membrane needs different resistance from one placed behind interior walls. Check the rated service life carefully. It may assume perfect installation, which rarely happens. Allow for handling damage and regular maintenance. Small punctures can become expensive leaks.

Safety and compatibility deserve equal attention. Confirm that the membrane has suitable fire behavior and does not release harmful substances under expected conditions. Review safety data and local building requirements. Also test compatibility with sealants, adhesives, insulation boards, fasteners, and vapor barriers. Some materials soften, shrink, or lose adhesion when paired incorrectly. A small sample test is practical. Leave it under realistic temperature and moisture conditions for several days. Do not skip this step. Even experienced teams can overlook an incompatible coating or a poorly prepared surface.

10 Tips for Choosing the Right Insulation Membrane - Checking Material Quality, Durability, Safety, and Compatibility

No. Selection Dimension What to Check Useful Technical Benchmark Why It Matters Recommended Action
1 Define the Membrane Function Confirm whether the product is intended to control water, air, vapor, wind, or a combination of these functions. A water-resistive barrier, air barrier, vapor retarder, and roof underlay perform different roles and should not be treated as interchangeable. Using the wrong membrane can trap moisture, allow air leakage, or permit water penetration. Match the product function to the wall, roof, floor, or foundation assembly before comparing prices.
2 Verify Material Quality Review the polymer or sheet construction, thickness consistency, reinforcement, surface finish, roll dimensions, and visible defects. The technical data sheet should state composition, nominal thickness or mass per unit area, dimensional tolerances, and test methods. Consistent material quality improves installation reliability and reduces weak points at overlaps and penetrations. Inspect sample rolls for pinholes, cracks, delamination, brittle areas, and uneven coating before purchase.
3 Check Water Resistance Look for liquid-water resistance, hydrostatic pressure, water-tightness, or water-penetration test results appropriate to the application. For roofing and exterior wall use, select a membrane tested to the relevant product standard and rated for the expected exposure conditions. A membrane may resist vapor diffusion yet still fail to stop liquid water if its seams or surface are not water-resistant. Check the complete system, including laps, tapes, sealants, fasteners, and flashing details.
4 Evaluate Vapor Permeance Compare the membrane’s vapor permeance with the climate, interior humidity, insulation position, and drying direction of the assembly. In U.S. practice, Class I vapor retarders are ≤ 0.1 perm, Class II are > 0.1 to 1.0 perm, and Class III are > 1.0 to 10 perm. Excessive vapor resistance on the wrong side of an assembly can increase the risk of condensation and trapped moisture. Use a hygrothermal assessment or local building-code guidance for cold, mixed, hot-humid, and marine climates.
5 Assess Air-Tightness Review air-leakage performance and determine whether the membrane is designed to form a continuous air-control layer. The air barrier should be continuous, durable, and sealed at joints, corners, service penetrations, windows, and changes in plane. Air leakage can transport heat and moisture through the assembly even when the insulation itself has a high thermal resistance. Use compatible tapes, gaskets, primers, and sealants, and require continuity checks during installation.
6 Confirm Mechanical Durability Check tensile strength, tear resistance, puncture resistance, elongation, flexibility, and resistance to damage from fasteners or job-site handling. Performance should be reported using recognized test methods such as ASTM, EN, or ISO methods relevant to the membrane type. Low tear or puncture resistance can create hidden openings that are difficult to locate after the insulation and cladding are installed. Choose a stronger grade for exposed construction periods, rough substrates, high-wind areas, and frequent foot traffic.
7 Review UV and Weather Exposure Check the permitted duration of exposure to sunlight, rain, wind, temperature changes, and construction delays. UV-exposure limits are product-specific; the installation guide should state the maximum allowable uncovered period. Some membranes lose strength or become difficult to seal after prolonged ultraviolet exposure. Plan cladding or roofing installation within the stated exposure period and replace visibly degraded material.
8 Check Fire and Health Safety Review reaction-to-fire classification, flame-spread information, smoke requirements, chemical emissions, and safe handling instructions. Fire performance depends on the membrane and the complete wall or roof assembly; confirm compliance with the applicable local code. Combustibility, smoke generation, and chemical exposure can affect occupant safety and the approval of the assembly. Request current fire-test documentation and safety data, and follow ventilation and personal-protection requirements during installation.
9 Test Compatibility Confirm compatibility with insulation, wood, concrete, masonry, metal, roofing sheets, cladding, adhesives, tapes, sealants, and treatment chemicals. The membrane manufacturer’s installation documentation should identify approved primers, adhesives, tapes, sealants, and substrate conditions. Plasticizers, solvents, oils, alkaline surfaces, or incompatible adhesives may weaken the membrane or its bond. Carry out a small adhesion and chemical-compatibility test whenever materials, substrates, or accessories are not explicitly listed.
10 Verify Installation and Long-Term Serviceability Review installation temperature, overlap width, fastening pattern, seam treatment, repair method, storage conditions, and expected service environment. The system should include documented details for laps, penetrations, corners, transitions, drainage, repairs, and replacement access. A high-performing membrane can fail if it is installed with inadequate overlaps, unsupported joints, or unsealed penetrations. Use an approved installation method, train installers, document inspections, and store rolls dry, protected, and off the ground.

Note: Technical values and classifications should always be confirmed against the current product data sheet, applicable building code, project climate, and the complete insulation assembly. Membrane performance depends on correct detailing and installation as well as the material itself.

Evaluating Installation Needs, Standards, Cost, and Maintenance

10 Tips for Choosing the Right Insulation Membrane

Evaluating Installation Needs, Standards, Cost, and Maintenance

Tip 1: Inspect the building first. Check roof shape, moisture exposure, ventilation, and access before selecting a membrane.

Tip 2: Match the membrane to the installation method. Some systems need heat welding, while others require mechanical fastening or adhesive.

Tip 3: Confirm substrate compatibility. Concrete, timber, and metal can react differently under changing temperatures.

Tip 4: Plan around weather conditions. Dust, rain, and cold surfaces can weaken installation quality. I learned this during a winter repair where rushed preparation caused small leaks.

Tip 5: Review local building standards and fire requirements. Ask for test reports, technical data, and installation guidance from qualified professionals.

Tip 6: Check the installer’s experience with similar buildings. A technically suitable membrane can still fail through poor detailing. Pay attention to edges, seams, drains, and penetrations.

Tip 7: Compare total cost, not only the purchase price. Include preparation, labor, tools, repairs, and expected service life. Cheap materials may demand expensive maintenance later.

Tip 8: Consider future access. Equipment, solar panels, and roof traffic can affect inspection and repair work.

Tip 9: Choose a maintenance routine before installation. Schedule inspections after severe weather and clear drainage paths regularly.

Tip 10: Keep records of products, batches, drawings, and repairs. This supports reliable decisions years later. One weakness remains: long-term performance can vary with workmanship and climate, so every project deserves a realistic review.

Go to Top